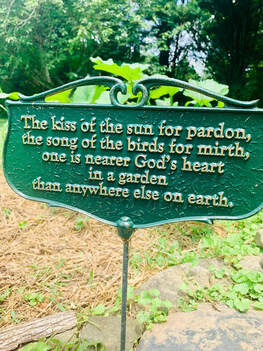
 As summer winds down, gardeners start itching to do something other than water, water, water. And, maybe, water. There’s a need to tidy up, move things around, plant something new. But hold on, anxious gardeners. You might just be on the verge of making a big garden mistake. For instance: It could be way too early to…
So just gather some important details before you attack that fall garden to-do list. Your plants will reward you for it next spring and summer.
0 Comments
4 sections of a thrift store you shouldn't overlook When you pop into a thrift store, you probably have a goal in mind—clothing, glassware, kitchen tools. You hit those sections, and you’re out. But discount stores often have sections within sections you’re overlooking on your targeted visits. Knowing that, here are some sections you might want to explore:
So on your next pop-in, add a few extra minutes to hit sections you normally avoid. You may be surprised what bargains those aisles hold just for you. 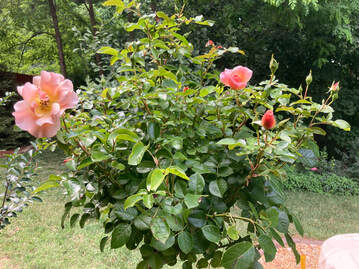 We’re officially in that time of the growing season when perennial shrubs are looking a little…tired. And roses probably look the worst. Time to prune!
But it’s hot, you say. And it’s humid. And I don’t want to make things worse. Fear not! Late-August to mid-September are excellent times to get in a healthy prune. With the right tools and techniques, you can convince those beauties to flush new growth and finish the gardening season strong. Just follow these steps:
Your roses may look a little “stark” after a good pruning. You might think, Oh no…what have I done?? Just know that roses will leaf out within days, looking fresh and happy, and not at all irritated with their late-summer cut. And within weeks, you’ll be rewarded with flowering beauty. 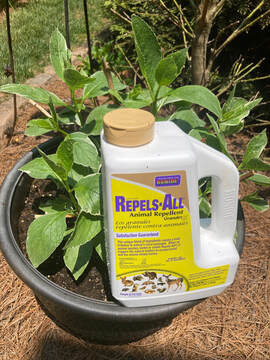 It’s that time of the gardening season where our hard work potting up beautiful plants, flowers, vegetables and herbs come to the rapt attention of…critters. Yes. Those naughty, curious, destructive, insistent chipmunks, squirrels, voles, mice, bunnies, raccoons, armadillos—you name it—just cannot leave our pots alone!
What can we do about the destruction, short of posting “No Critters Allowed” signage everywhere these persistent non-readers gather? Here’s what I find works:
As usual, the chemical deterrents work best. But if you’re chemical-adverse, give the DIY options a shot. Hit or miss, your wildlife will appreciate the challenge.  If you live in or near the woods, like I do, a constant Battle for the Plants rages between humans and wildlife. And the most notorious contestants? Deer.
Hostas, impatiens, daylilies, lavender, yarrow, catmint, lamb’s ear, hydrangeas, ageratum—even thorned roses—are all delectable treats for nibbling deer lips. And sometimes even your more genius deterrent efforts fail. Your best long-term solution is redirecting their paths with fencing, lighting, lawn sprinklers, and wind chimes. But for short-term solutions, consider these:
By Fall, you may just be tired of the deer battle and resort to deer-resistant plants. But if you really, really, really want those hostas in your shade gardens, a smattering of creative solutions may do the trick! 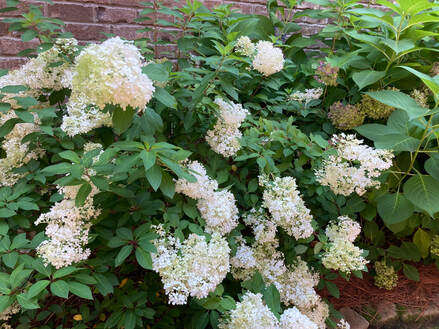 If you’ve ever grown hydrangeas, you know they crave one element more than any others: water. With “hydra” as part of their name, you can probably guess they are not drought-tolerant plants. Plus, their shallow root systems lose moisture quickly. On average, hydrangeas need water at least every other day, and deep watering once/week.
BUT…some varieties can do better in the hot, rainless, dog days of summer than others. Try these Zone 3-8 options:
So if you’re in the market for hydrangeas—but worry about watering needs—choose panicle varieties like these. Then relax on your porch, deck or garden bench and enjoy the show!
If you’re a seasoned party host, you dread that doorbell about 15 minutes before the first guest is due to arrive. Why? Because it’s 15 minutes before the first guest is supposed to arrive, and you’re in the zone! You’re mentally checking off to-do items, tidying up the kitchen, checking your lipstick, and generally attempting to adopt a serene look that says, “We were just sitting around, sipping champagne, killing time.” *DING-DONG* will clang all over your forced serenity.
To adapt smoothly to early guests, I leave a few easy chores undone. That way, when your early guest asks, “How can I help?” …you’re ready to assign these duties.
Not every party guest is comfortable milling about, making small talk at party kickoff. This is a great time to let them:
During the party, an antsy or bored guest might need a job. They might like to:
When the party starts to wind down, but a few guests linger in deep conversation, a spouse/partner/child might need a task to stay engaged. Consider letting them:
Bottom line: A great host can do it all, no help needed. But a savvy host is always ready to engage guests in every situation, ensuring each attendee feels welcomed and appreciated from the first DING-DONG! 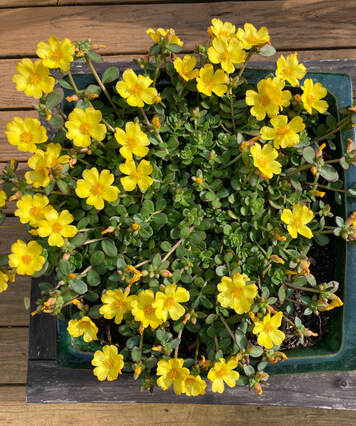 Wasn’t spring grand? All those cool, breezy months of budding trees, unfolding tulips, raindrops on roses, whiskers on kittens. Ahhh… And then BAM! Almost overnight, we blasted into the dog days of summer—those cloudless, parched, blazing hot, brutal days that suck the energy out of both humans and vegetation. The dog days are when your outdoor containers really need the workhorses of plants. The persistent sun and heat can dry out soil in even the best-made pots, so filling them with drought-tolerant flora will save you from twice-daily watering and summer-plant fatigue. Give these a try in your thrill, fill, spill combinations:
 Ground covers often get a bad name, because next to them you’ll inevitably find the word “invasive.” But that may be exactly why you need them! When a creeping plant “invades” a space, it chokes out weeds and can even suppress erosion on hilly landscapes. They spread by either underground runners from the main plant or by developing roots along their stems.
Consider these hardy beauties:
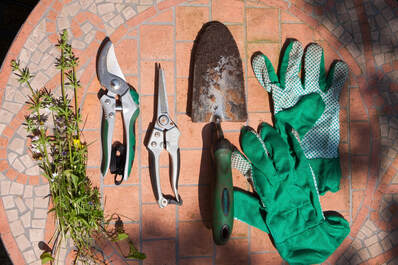 My best pruning shears were not special order. They weren’t pricey, and a cool leather sheath was not included. I had to polish and inspect the blade for the brand just now, because I’m pretty sure I bought them from a big-box store. Turns out, they’re Melnor hand pruners and make the rounds with me in every garden outing. Why? Because they’re so comfortable to use, they feel like an extension of my hand. And that’s how I would kick off my list of…How to Select Pruners for your Garden Tool Collection
|
Christine SchaubA Michigan farm girl transplanted to the South offering hospitality hacks. Categories
All
Archives
April 2024
Categories
All
|

 RSS Feed