|
Have you ever looked around your living space and thought, ‘I’m so tired of this…’? It was probably just fine five years ago when you moved in or the kids were little or you were going through that orange phase. But now…meh. Or even…ick.
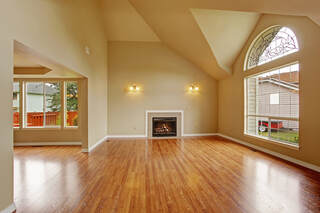
You know what you need? A redesign. Not a remodel—too expensive, too irritating and, possibly, too risky. A redesign leaves the walls, windows, electrical and floors right where they are. They just get a little “tweak.” For this concept, you’ll need a cohort in design. Do you have a friend whose living space always looks crisp, up-to-date, and in need of zero alteration? That’s the person you’ll want to ask for help. If you’re tired of your stale space, that friend is most certainly tired of it, too! In fact, this may be just the opportunity they’ve been waiting for. Once you’ve chosen the space (living room, master bedroom, office are great options) and you’ve lined up your redesign cohort, you’re ready for these next five steps: Step 1: Clear out everything from the room. Yes, everything—the furniture, the rugs, the drapes, any art or knickknacks on the walls. Every single part of that room should look like someone is about to move in. Because after this redesign, you will! Set aside any item you absolutely must have in that room—like family portraits, seating, and heirloom pieces. Everything else should be boxed up for storage or donation. You must, as that irritating song reminds us, “let it go.” Step 2: Clean, clean, clean. You want every surface—walls, baseboards, floors mantles—to be squeaky clean before you make another move. At this point, the space will look and smell so fresh you might just decide to set up a tent for some overnight glamping. Step 3: Paint. If your funds are extremely limited, paint just one wall. If you have a discount option near you (like Habitat for Humanity‘s Restore), you can often buy unopened surplus paint for a pittance. If you’re not dead set on a specific color, this option is for you. And then you can afford to paint every wall! Step 4: Release the space to your design cohort. And “release” in this scenario means you leave the house for a determined amount of time and cut your designer friend loose. This sounds risky, but a trusted friend knows your style and what you won’t accept or find outrageous. Bonus: Hand over $100 for your friend to use however they wish—window coverings, open shelving, paint, design bits and bobs. Provide no limitations on what this designer wants to do! Then go drown your nervousness in a cup of overpriced coffee. Go ahead and get the pastry. Step 5: Revel in the reveal! Yes, the reveal feels and looks just like those moments on TV. You walk in a little nervous about the space and squeal with joy when you see it all reimagined. You might actually be shocked with furniture and art placement. You’ll find yourself saying, over and over, “I never would have thought to do that!” Keep in mind: If you’re a bit of a knickknack hoarder, the new space might look a little empty. Live with it for a week before you add back some clutter. If the windows feel naked without drapes, try low-level lighting to soften the sudden brightness. If the furniture arrangement feels completely unfamiliar, use the room in different ways, for different purposes. Not only is a redesign affordable, it drags you out of a design rut. In as little as two days, you and your space can be refreshed and ready for the next adventure. Now, about that patio…
0 Comments
Leave a Reply. |
Christine SchaubA Michigan farm girl transplanted to the South offering hospitality hacks. Categories
All
Archives
July 2024
Categories
All
|

 RSS Feed
