COME ON OVER
  • Home
  • About
  • Blog
  • Media
  • Merchandise
  • Contact
  • Etsy Shop

Just spooning

11/30/2023

0 Comments

 
Picture
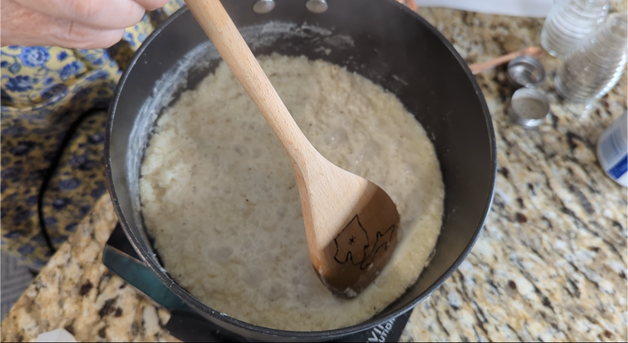
Have you taken stock of your wooden spoons lately? I mean, other than their legendary status as a spanking spoon—or just the threat of a bopping—they’re considered symbols of hospitality, and have remained kitchen staples since Ancient Egypt wasn’t exactly ancient yet.

Unlike metal spoons, the wooden utensil won’t scratch pans or bowls, won’t conduct heat and burn your hand or alter your cooking temps, are non-reactive with acidic foods, and won’t crack glass if you’re stirring a bit aggressively. On the flip side, wooden spoons can retain flavors—so that garlic pasta sauce you stirred last night might not go well with the cookie dough you’re mixing today.

Now, if you’re being hospitable and using your wooden utensils properly and regularly, are you cleaning them appropriately? Let’s find out by exploring how your spoons want to survive your kitchen.

  • Use soap and warm water. Remember that flavor-retention factor? Bleach is not your spoon’s friend here. A bit of mild detergent on the scrubbing side of a sponge works well after every use.
  • Create a mixture of baking soda and distilled white vinegar. This old-fashioned remedy works beautifully to deep-clean wooden spoons. Use equal parts soda and vinegar, then combine with boiling water. The solution will foam—science experiment!—and that’s when you dunk in your spoons for a 15-minute soak. Rinse and air-dry.
  • Squeeze a lemon over baking soda. Just a sprinkle of soda and a firm lemon scrubbing will clean and freshen your spoons. This works particularly well with melted cheese clinging to your utensils. Rinse with warm, soapy water and air-dry.
  • Boil them. If you’re super-hygienic, about 20 minutes in boiling water should kill off any lingering flavors, bacteria, debris or grime. That level of soaking will require more air-drying time, though, so let them sit in an open-air drainer for awhile.
  • Rub with oil. Yes—even spoons appreciate a little pampering after some hard use. Either olive or coconut oil will rub in nicely with a soft cloth. Air-dry overnight, wipe down, and store as usual.
  • Avoid the dishwasher. Unless you’re okay with a warped, cracked, swollen spoon, you want to hand-wash any utensils with wood in them—including spatulas, turners, and whisks. The prolonged heat, rinsing and drying cycles are too severe, as well as the detergents. Hand-wash for longevity.

Wooden utensils are more than just kitchen essentials—they’re pretty, versatile, and are often passed down through generations of home chefs. Treat them well, and they’ll reward you with their can-do spirit.
0 Comments

Gobbling up those leftovers

11/24/2023

0 Comments

 
Picture
Congratulations! Thanksgiving was an enormous success, and all you have to do the next few days is… Find something to do with alllllllll those leftovers. Sure, sure, you can whip up the traditional turkey sandwich and chili, but consider some new options, like:

  • Turkey enchiladas/casserole. Whether you wrap or layer the turkey, the enchilada sauce and cheese make for a smooth, spicy change. Bonus: One-dish oven meal! Double bonus: You can assemble and freeze a second one for later.
  • Potato patties. Sometimes called “fried potato cakes” or “potato fritters,” these are wonderful for—wait for it—BREAKFAST! Yes! Those houseguests who’ve worked up quite the appetite will appreciate a hearty farm-style kickoff to their second day of lounging around. Bonus: Easy, easy ingredients, and ready in about four minutes.
  • Squash puppies. Skip right to the deep-frying for this take on the traditional hush puppy. Your squash is already cooked, so you only need to add your favorite ingredients to either spice it up or keep it kid-friendly. Bonus: Also works with leftover mashed potatoes!
  • Fried corn. Why simply warm up leftover corn when you can FRY IT IN BUTTER? Corn almost caramelizes with this buttery method. Add a generous shake of pepper and you have a spicy, crunchy side dish to die for. Bonus: Works even better with fresh corn you never got around to cutting off the cob.
  • Jam shortbread/bars. You’ll probably never finish that giant jar of blackberry jam you bought for finicky kid-eaters. So why not slather it between buttery crusts and offer it as an afternoon treat? Bonus: Also doubles as a desert.

So fear not, over-preparers! All those leftovers need not go to waste, nor do they have to be heated up as Thanksgiving II. Just raid your pantry and whip up fresh meals, sides and treats to please everybody. You’re welcome.

0 Comments

5 Things Every Guest Bathroom Needs

11/2/2023

0 Comments

 
When was the last time you shaved, put on makeup or generally got ready for a day/night out in your guest bathroom? Did you have everything you needed? Was the lighting good? Did the shower drain? Or…was the toilet paper missing, lightbulbs burned out, and water standing in the tub? These are basic issues you need to check and resolve before any guest steps through your front door.

But if you want to be a SUPER host, you have a little more guest work to do to attain that title. Have your guest bathroom stocked with these items:

  1. Jewelry holder. You don’t want to be the host who’s disassembling the sink drain mid-party to retrieve an heirloom diamond ring. Solve that slip-down-the-drain issue by placing a pretty plate or small bowl on the counter a fair distance from the sink. 
  2. Nightlight. Help your guests avoid the middle-of-the-night glare from overhead lights—or worse, a loud exhaust fan—by installing an inexpensive nightlight. Bonus points if the light is motion-activated.
  3. Air freshener. No guest wants to utter the words, “You don’t want to go in there…” after using the toilet. Help them avoid that topic by placing a can of Febreeze or Oust right next to the potty. Be very proactive by supplying Just A Drop odor eliminator. It works in the water before a “deposit” is made!
  4. Tissues. Sure—toilet paper works fine for nose blowing, but tissues are a more elegant way to solve that issue. Score major points if you provide a tissue option with lotion.
  5. Touch-up toiletries. You will forever impress a guest who may have had a pre-party disaster or luggage delay by supplying travel-sized contact cases and solution, hairspray, lotion, nail files, toothbrush/toothpaste combos, and deodorant. Just collect these items in a basket and place them on the back of the toilet. 

With just a little bit of pre-planning and stocking, you can help any guest prepare for a fun evening or weekend—your treat! And then you’ll wear that Super-Host hat proudly…right after you re-stock the toilet paper. 
0 Comments

5 ways to reheat pasta leftovers

10/17/2023

0 Comments

 
Picture
All day, you’ve been looking forward to those pasta leftovers from last night’s glorious meal. But when you open the storage lid…hmm…that delectable dinner looks dry and unappetizing. How can you reheat it and get back to that dreamy feast? Try this:

  1. Avoid the microwave. It’s soooo tempting—especially when you’re famished—to quick-zap that pasta, but don’t do it! You’ll get rubbery, sticky, and even drier results. And that’s no one’s leftovers goal.
  2. Add a liquid. Pasta will absorb moisture from any sauce you used, so you must add a little water or chicken stock, a drizzle of olive oil, or more pasta sauce to get those juices flowing again. More sauce is your best bet, but alternative liquid is better than none.
  3. Add grated cheese. Cheese has between 30-40% water already in it, so it’s a great way to add moisture and flavor. Top with Parmesan or a blend with Reggiano—and fresh-grate it for ideal results. 
  4. Use a lidded stock pan. Yes—dump it right back into the pan you used last night, add the lid for a “steam” effect, then get a slow warm-up going.
  5. Use a covered casserole dish. If you baked and stored it right in the same dish, just cover it with foil and put it back into a 350° oven for 15-20 minutes. 

So, don’t let those pasta leftovers dry out and languish in your fridge. Heat them up the right way and you’ll be yumming it up all over again.

0 Comments

You bet your glass!

10/3/2023

0 Comments

 
Picture
​When you’re invited to a home-cooked meal, would you rather sip that icy water from a glass or plastic cup? You said “glass,” right? Of course you did. Because no one sits down to dinner, takes a sip, and says, “Man…I wish I had a plastic cup.”

Glassware is the easiest, most economical way to dress up any table for any occasion. You can spend very little on a collection from discount stores, estate sales and antique malls. Or…you can go wild with pricey options in crystal. Best time to do that? Your wedding.

Here are some guidelines for building, storing and maintaining your glassware collection:

  • Collect sets of eight in tall, medium and petite sizes. Why eight? Most dining tables seat eight, so you can be assured you’ll have the maximum amount of glassware on hand, no matter how many guests join you for supper. Bonus: Medium sizes are great for lunch; petite sizes are perfect for breakfast juices.
  • Consider specialty glassware. If you love to serve iced tea, there’s a tall, skinny glass for that! How about martinis? You’ll definitely want to have the right vessel to showcase that concoction. Wine, beer and cocktails all feel more special in their appropriate glassware. Tip: Stemmed glassware is more challenging to store, so consider shelving or cabinets with a hanging rack to suspend them above other items.
  • Store sets together. Who wants to sort through cabinets for that sixth glass when company’s on their way? Not you! That’s why keeping your sets together maintains your hosting sanity. Tip: For vase-shaped glassware, store every other glass with the widest point up, then down, then varying. Avoid stacking  glasses, as this can cause them to stick and shatter when prying them apart.
  • Eliminate mismatched pieces. Unless a particular glass holds childhood or family meaning, hand it off to Goodwill. You don’t really need it…but someone else might! You’ll love the symmetry of matching glasses all lined up and ready to serve you.
  • Wash under the right settings. A crystal glass has much more clarity than normal glass, and that clarity lasts longer by hand washing. Yes—it’s a pain to do that. Which is why you should rinse them, but wait to complete the washing until the next morning, when you’re rested. Some dishwashers have a “crystal” setting. Try it out! Just be sure glassware doesn’t touch other items, and use detergents without lemon in them. Tip: If you have hard water with high mineral content, your glassware will likely cloud up. Look into a brand with a water softener built into it. 

If you’re young and putting your first real kitchen together, opt for affordable glass. Accidents happen during pizza night. If you’re ready to up your entertainment game, consider crystal. It shines beautifully in candlelight. But whatever you choose, start now. Your guests will silently thank you as they sip.


0 Comments

A gardener for all seasons

9/26/2023

0 Comments

 
Picture
As summer winds down, gardeners start itching to do something other than water, water, water. And, maybe, water. There’s a need to tidy up, move things around, plant something new. But hold on, anxious gardeners. You might just be on the verge of making a big garden mistake. For instance:

It could be way too early to…
  • Plant spring bulbs. Yes—bulbs are in stores, calling your name, enticing you with their pictures of cheerful pastel blooms. But the ground is still too warm right now in most garden zones. Plant too early and they will sprout before the first freeze. Think: mid-to-late October for zones 4/5, November for zones 6-8.
  • Trim back trees and shrubs. While you can cut away broken, dead or diseased branches at any time, major pruning is a terrible idea right now. Why? Pruning stimulates new growth, and that beautiful growth will shrivel up and die in a snap freeze or even dramatic temperature drops. The best time to seriously prune is late-winter/early-spring. 
  • Move blooming perennials. While early-fall is usually a great time to divide and/or transplant your perennials, you can sap energy and do serious damage to blooming—especially ever-blooming—shrubs. Instead, wait several weeks past their last blooms, or even until they’ve gone dormant.

Do some research before you…
  • Buy trees and shrubs for the wrong garden zones. Hardiness zones are essential for growing plants in your geographic area. Your climate may be too cold or even too warm for something you see in a magazine, so go local. A nearby garden center will probably carry perennials for your zone, but an online grower has plants that will prefer Michigan weather to Louisiana. Know exactly what zone you live in by typing in your ZIP code on the US Department of Agriculture website. 
  • Plant perennials in the wrong sun/shade areas. Trees die and grow, buildings come down or go up, and the sun shifts in the sky throughout the seasons. All of those situations change the amount of sun or shade your new perennials will need to survive and flourish. Think two seasons ahead to determine if those hostas or hydrangeas will fry in full sun, or young roses will peter out in deep shade.

So just gather some important details before you attack that fall garden to-do list. Your plants will reward you for it next spring and summer. 
0 Comments

A bag full of second chances

8/28/2023

1 Comment

 
Picture
When you pop into a thrift store, you probably have a goal in mind—clothing, glassware, kitchen tools. You hit those sections, and you’re out. But discount stores often have sections within sections you’re overlooking on your targeted visits.

Knowing that, here are some sections you might want to explore:
  • Greeting cards. Tucked into the decorations aisle is a hodgepodge of birthday, sympathy, wedding, thank-you, and holiday cards…for 25 cents! That’s a giant discount from the regularly $5-$8 cards you’ll find in grocery, pharmacy and specialty stores. Stock up for last-minute greetings.
  • Games. If you’d avoiding the childrens’ toys section because you really don’t need more plastic pieces to step on, reconsider! That’s where you’ll find family games galore. Peek inside to ensure most of the pieces are included. Find missing parts on eBay or other online stores.
  • Art. While you may not need furniture, you’ll want to take a spin through that area to find affordable decorations for any room in your home. Artwork already framed is a bonus! If you don’t love the frame, consider painting it—you’ll have a new look in less than an hour. If you love only the frame, it’s still a win.
  • Votive candle holders. Often scattered within the glassware section are little glass cups with bell-top designs to hold votive candles. Votives are wonderful for lighting up dinner parties, deck gatherings and porch sittings. You may have to scour every shelf for a complete set, but it’s worth the effort when you ring up 14 of them for less than $2! 

So on your next pop-in, add a few extra minutes to hit sections you normally avoid. You may be surprised what bargains those aisles hold just for you.
1 Comment

Run for the roses...with pruning shears!

8/23/2023

0 Comments

 
Picture
We’re officially in that time of the growing season when perennial shrubs are looking a little…tired. And roses probably look the worst. Time to prune!

​But it’s hot, you say. And it’s humid. And I don’t want to make things worse. Fear not! Late-August to mid-September are excellent times to get in a healthy prune. With the right tools and techniques, you can convince those beauties to flush new growth and finish the gardening season strong.

Just follow these steps:
  1. Clean and sharpen your pruners. Gardening tools can carry diseases—like black spot and fungus—from plant to plant, so wiping them down with disinfectant (like Clorox’s bleach-free wipes) is essential. Then check your blades for sharpness, and you’re ready to go!
  2. Wear long sleeves and gloves. Most roses have prickly elements to them. They’re a defense mechanism against deer, rabbits, squirrels and…you! If you prepare for that, you won’t leave your pruning session looking like you tussled with a playful kitten.
  3. Prune in the evening. As the sun starts to set and the temperature drops, both you and the shrubs will appreciate the breather. The rose canes will begin the healing process overnight and be ready to take on that late-summer sun by morning.
  4. Find the 5-leaflet leaves. Roses have 3-and 5-patterns of leaf-growth. For a light prune, trim just above the first set of 5-leaflets. For a harder prune, go back to the third set of 5-leaflets. The recovery will take longer, but deeper prunes promote better growth of both leaves and blooms.
  5. Cut out dead canes and damaged leaves. While you’re in there, trim out anything looking dead and/or diseased. Your shrubs will look better, air circulation will improve, and you’ll help stop disease before it spreads.
  6. Remove everything you trimmed. Gather up your hard work and put it in a bag for trash pickup. This is essential to thwart disease-spread and pest havens. You didn’t want what you trimmed on the bush, so you certainly don’t want it elsewhere in your yard or garden! 
  7. Fertilize. Roses are big feeders, so now’s the time to scoot back the mulch and spread some slow-release fertilizer. If you have rose-specific food, great! If not, use any low-nitrogen (2-4-1 nitrogen/phosphorous/potassium) mix you have on hand. Some fertilizer is better than no fertilizer.

Your roses may look a little “stark” after a good pruning. You might think, Oh no…what have I done?? Just know that roses will leaf out within days, looking fresh and happy, and not at all irritated with their late-summer cut. And within weeks, you’ll be rewarded with flowering beauty.
0 Comments

The potheads of the animal kingdom

8/8/2023

0 Comments

 
Picture
It’s that time of the gardening season where our hard work potting up beautiful plants, flowers, vegetables and herbs come to the rapt attention of…critters. Yes. Those naughty, curious, destructive, insistent chipmunks, squirrels, voles, mice, bunnies, raccoons, armadillos—you name it—just cannot leave our pots alone! 

What can we do about the destruction, short of posting “No Critters Allowed” signage everywhere these persistent non-readers gather? Here’s what I find works:


  • Bonide’s Repels-All. Available in granules and spray, this animal deterrent irritates nasal passages. You’ll understand why the moment you crack it open because shoo-wee it reeks! It’s biodegradable and harms nothing but your nose. Caution: If you love birds, keep this away from feeders and bird habitats. They hate it, too.
  • Milorganite organic fertilizer. Used primarily to green up lawns, this granular, slow-release, nitrogen fertilizer also effectively runs off critters because—stink alert!—it’s quite odiferous. Combined with Repels-All, it’s incredibly effective. Caution: Check your local laws for restricted use.
  • Plastic forks. Only mildly effective for dining, those pointy tines—used in large amounts—can deter digging by creating a functional and potentially painful fence. Of course, you then have a fork fence. Around your beautiful flowers. But bonus: You’re also aerating the soil.
  • Cayenne pepper. You may like spicy food, but critters don’t enjoy the paw-licking kick of any red pepper. You can teach them a lesson and use up those expired spices at the same time. Bonus: Make your own hot pepper spray!
  • Mint. Critters aren’t really into fresh breath, so steeping a handful of this herb in 4 cups of boiling water for 24 hours and spraying the stems/leaves of plants is an herbal deterrent. Pro Tip: Mix in 2 TB of both cayenne pepper and garlic powder for maximum stink.
  • Bone meal powder. This natural fertilizer has a strong smell critters don’t appreciate. Just mix it in with your potting soil before planting. Caution: Bone meal can be toxic to dog and cats.
  • Strong coffee grounds. Ahhh…the smell of coffee in the morning. Delightful to humans, its fragrance has an ick-factor to critters. Just mix in your grounds with the top inch of soil. Bonus: Coffee hour is every hour!
  • Stone, gravel or pebbles. Top dress your pots with at least a one-inch layer of light-colored small/medium stones to let water through and camouflage the soil underneath. Too much work for most critters to dig through. Bonus: Adding this stone mulch helps soil retain more moisture.
  • Chicken wire. If you’re truly desperate and don’t mind the caged look, you can stop the critters at the door. A wire cage works as a “cloche” to let plants thrive, but stop the digging. Pro Tip: Add the wire to the top of soil and let young plants grow through the layer.
  • Hair. If you have a dog or lots of hair in your human brush, you can tuck chunks of hair atop the soil, then cover with a layer of mulch. Worth a try!

As usual, the chemical deterrents work best. But if you’re chemical-adverse, give the DIY options a shot. Hit or miss, your wildlife will appreciate the challenge.
0 Comments

The Bambi Brawl

8/7/2023

0 Comments

 
Picture
If you live in or near the woods, like I do, a constant Battle for the Plants rages between humans and wildlife. And the most notorious contestants? Deer.
​

Hostas, impatiens, daylilies, lavender, yarrow, catmint, lamb’s ear, hydrangeas, ageratum—even thorned roses—are all delectable treats for nibbling deer lips. And sometimes even your more genius deterrent efforts fail. Your best long-term solution is redirecting their paths with fencing, lighting, lawn sprinklers, and wind chimes. But for short-term solutions, consider these:
  • Deer repellant. This taste-based spray works on contact—but only on contact.  Which means those deer lips are already reaching for your blooms before they go, “Hmmm…” A repellant with hot sauce can burn their tongues. Those with garlic may burn their noses. Other ingredients simply taste bad. Caution: Spray deterrents must be applied liberally and after heavy rains. 
  • Milorganite. This organic fertilizer is super-stinky. Combined with deer repellant, the odor is enough to scare off pretty much anything. Find this slow-release, granular product at any home-improvement store. Bonus: It’s great for your lawn and perennial shrubs.
  • Human hair. Human smells project “Danger!” to deer, so nylon bags of human hair are a natural deterrent. Caution: You’ll need lots of it and the scent fades in a few weeks. 
  • Chicken wire on the ground. While deer necks can stretch 24 inches or more over wire fencing, their feet must stay on the ground. And deer really don’t like getting their hooves caught up in wire or netting. Simply unroll it in front of your plants between mowings. Bonus: It’s a very affordable option.

By Fall, you may just be tired of the deer battle and resort to deer-resistant plants. But if you really, really, really want those hostas in your shade gardens, a smattering of creative solutions may do the trick!
0 Comments
<<Previous

    Christine Schaub

    A Michigan farm girl transplanted to the South offering hospitality hacks.

    Archives

    November 2023
    October 2023
    September 2023
    August 2023
    July 2023
    June 2023
    May 2023
    March 2023
    December 2022
    July 2022
    May 2022
    March 2022
    February 2022
    January 2022
    December 2021
    November 2021
    October 2021
    September 2021
    August 2021
    July 2021
    June 2021
    May 2021

    Categories

    All

    RSS Feed

Picture
Proudly powered by Weebly
Photos from shixart1985 (CC BY 2.0), chimpwithcan, wuestenigel (CC BY 2.0), vleka, James E. Petts, shixart1985, Sam Howzit, Tauralbus, Joe K Gage, wuestenigel, wuestenigel, Key West Wedding Photography, VirtualWolf, Free For Commercial Use Fashion Lifestyle Images
  • Home
  • About
  • Blog
  • Media
  • Merchandise
  • Contact
  • Etsy Shop